Showing posts with label chocolate. Show all posts

Wednesday, June 7, 2017

Mint Ganache-filled Chocolates


Yesterday, my 6-yo niece opened up my 2 bars of dark baking chocolate, and messed up the packaging enough that I couldn't re-wrap them. I was afraid of them getting dirty or eaten by mice, so I decided to make mint chocolate truffles. Then on a whim, I asked my cousin B if she happened to have chocolate molds.

The answer: YES!

Therefore, I went and made an improved version of the encased chocolates I failed at before.


This second attempt at tempering chocolate worked well. I guess it did help that I didn't get interrupted midway because dinner needed to be made and I needed to move away from the stove. I first filled the molds (half-spheres and heart shapes) with the chocolate, then upended them to form hollow shells. 10 minutes in the fridge, then I could fill them with my prepared minty ganache.


After another 5-minute nap in the fridge, I covered the bottoms of the chocolates with more tempered chocolates and let them nap some more in the fridge.

Today, I took advantage of the daylight to snap some nice pictures. The top (shell) layer of chocolate is a bit thick for my liking, but I'm really glad that they turned out so nice! And I must say, that mint chocolate ganache is pretty addicting!

Sunday, September 25, 2016

Chocolate-Encased Mint Truffles


I made a batch of mint truffles at home to give to some family friends, and also to share with my family. My 5-year-old niece got involved, helping me break apart chocolate, and mixing in the cream.

For the family friends, I did not have time to coat them. In fact, I only barely managed to roll them in cocoa powder, they were so soft. My niece didn't like them coated, as the cocoa powder is pretty bitter, so she just ate the filling.

With the 2nd half of the batch, I tried to make them last a little longer, so I tried to temper chocolate for the first time. By the time my chocolate was tempered, the filling was no longer holding shape. By then, I was too tired to start over, so I just scooped portions of filling and dropped it into the chocolate. The whole thing was then laid on a sheet of baking paper. When all the filling was covered, I rolled them in cocoa powder.

Tuesday, August 2, 2016

Mint Chocolate Truffles


I like watching cooking videos on Youtube, and I once went on a Gordon Ramsay spree. In a two-part video, he made mint chocolate truffles with his children. Those are what I tried to make for my friends and to give to the staff of a tea house where my friend works.

The video doesn't give the proportions of ingredients, so I got them off Good to Know. I did change a few proportions myself, but more on that in the recipe below. For a few ingredients (butter, sweeteners), I simply eyeballed the amount. I also used as much chocolate as I had, and scaled down the rest of the ingredients based on that.


RECIPE
  Ingredients
  • 500 g dark chocolate, chopped
  • 500 mL heavy cream
  • 1 small bunch fresh mint
  • 100 g butter, softened
  • honey/brown sugar, to taste
  • unsweetened cocoa powder
  Procedure
  1. Lightly bruise the bunch of mint to release its fragrance. Put it in a pot with the cream.
  2. Heat over medium-low heat until bubbling.
  3. In a heat-proof bowl, put chocolate and butter.
  4. When the cream bubbles, mix in sweetener.
  5. Strain hot cream into the chocolate. Mix until chocolate is melted and smooth.
  6. Pour in a wide, dish. Let cool to room temperature, then refrigerate at least 1 hour.
  7. When cold, take teaspoonfuls out, roll into balls, and drop in a plate of cocoa powder. Roll around to coat.
  8. Eat within 3-4 days.

Chocolate Mudcake


My friend's birthday was last month, so when I moved in temporarily into the apartment she shares with a couple other friends, I brought a chocolate cake with me. I didn't have any cocoa powder on me, however, so I used a white chocolate mudcake recipe and subbed dark chocolate for the white chocolate.


Without my usual tools, I had to eyeball the cutting of the cake in half to put whipped cream between both halves.


Random decoration with chocolate chips and shaved choc chips.


Recipe similar to the white chocolate mudcake in this cake~

Thursday, February 18, 2016

Orange Chocolate Cake


To celebrate a double birthday (early birthdays for my brother and my dad), I made two desserts. Well technically, I was supposed to just make this cake, and my cousin B was supposed to make the apple tart. In the end, she had other stuff to do as well, so she helped me make the applesauce. Then I made the rest of the tart using store-bought puff pastry for the crust. This was also because my dad mentioned preferring it with puff pastry.


While debating what cake to make, I recalled the Black Forest cake I had made. I didn't have applesauce, but I used some my cousin made for the apple tart. I also used a sweetened cocoa powder (like those to mix in milk) as I did not have unsweetened cocoa, so reduced the sugar a lot. Also, instead of using 1/2 cup of decaf, I used about 1/4 cup decaf, and 1/4 cup fresh squeezed orange juice. To add to the orange flavor, I zested an organic orange and threw it in with the dry ingredients.


For decoration, I sliced a smaller organic orange and simmered it in a simple sugar syrup (1 part sugar, 1 part water) until translucent, then drained on a grill. On a whim, I took some chocolate, melted it with a bit of vegetable oil to make it shinier. Then I swiped some leaf/drop shapes on a sheet of baking paper using the back of a spoon, and put it in the freezer to set.


I whipped cream with some icing sugar in it and put it between the two cake halves. Then I spread the rest over the top of the cake, and cut halves of candied orange slices before arranging them on top. With the chocolate, I settled for a flower-like shape, trying my best to keep the chocolate from melting in my hands. I chopped up a bit of a leftover candied orange for the flower's center.


Here's the cake with the candles, as well as a bit of the apple tart. I had planned to try making my own puff pastry, but didn't want to make the effort while having so much to do that day. Unfortunately, I had forgotten my camera at college, so had to settle with my phone's camera. We had a nice dinner with family, ate the cake, apple tart, and a fruit salad accompanied by some tea, then played games. All in all, it was a great party!

Tuesday, February 2, 2016

Black Forest Cake (No Liquor)


For a first hallway dinner of the semester, I opted once again to make dessert. As it is still the beginning of the semester, and my workload is still manageable, I decided to make something a little fancier than plain cupcakes or something.


One unfortunate side effect due to my procrastination is that I tend to start baking kind of late. In the winter, this means that by the time I have a finished product, I'm required to take pictures with indoors lights instead of natural daylight. This leads to a lot of pictures that are more on the yellow side... As this cake was eaten about an hour after it was baked, I could not wait until tomorrow to take pictures.

I signed up for dessert, as usual, but this morning, I still did not know what to make. On a whim, I opted for chocolate cake. Then the thought of "Black Forest Cake" popped into my head, so I worked towards that. The chocolate cake recipe is from Minimalist Baker.


After the cake was baked, I cut it in half, and put a layer of whipped cream and a layer of cherries (from a jar of pitted cherries, with the juice thickened with some cornstarch). I closed it off with the second layer, more whipped cream, and 8 cherries I had reserved. The rest of the surface was covered in shaved milk chocolate (all I had in stock), as I did not have time to pipe a pattern with the cream, as I had originally intended.


The cake recipe yielded an extremely moist cake that went well with the cherries. Upon hindsight, the cake would have been much better if the top also had an entire layer of cherries, but I had not purchased enough, so had to make do with what I had. Except for the whipped cream, this cake is vegan.

RECIPE
  Ingredients

     Chocolate Cake (adapted from Minimalist Baker)
  • 1 1/2 cup unsweetened almond milk
  • 2 tsp vinegar (white or apple cider)
  • 1 1/4 cup apple sauce
  • 1/2 cup strong brewed coffee (I used decaf)
  • 2/3 cup melted coconut oil, or other neutral oil
  • 1 packet vanilla sugar, or 1 tsp vanilla extract
  • 2 cups + 2 tbs flour
  • 3/4 cup cane sugar
  • 1 cup unsweetened cocoa powder
  • 2 tsp baking soda
  • 1 tsp baking powder
  • 1/4 tsp salt
     Topping
  • 1 jar or can pitted cherries
  • whipping cream (use non-dairy cream for vegan option)
  • icing sugar (optional)
  • chocolate
  Procedure

     Chocolate Cake
  1. Preheat oven 176˚C.
  2. In a mixing bowl, mix almond milk and vinegar. Set aside a few minutes to activate.
  3. Add oil, coffee, applesauce, and whisk until foamy*.
  4. Sift in flour, cocoa powder, sugar, baking soda, baking powder, and salt progressively while whisking or beating.
  5. Taste and add sugar as desired.
  6. Pour into prepared pan. Bake for 25-30 min.
  7. Let cool in pan for a few minutes, then remove and cool completely on a rack.
      * Mine didn't foam up, but still ended up fine.

     Assembly
  1. Cut the cake into 2 halves.
  2. Whip cream with desired amount of icing sugar.
  3. Drain cherries, and reserve some for the topping.
  4. In a small pot, mix remaining drained cherries, 1/4 cup of their juice, a sprinkling of sugar, to taste, and 2 tsp cornstarch. Heat until thickened, then cool completely.
  5. On the first layer of cake, spread an even amount of whipped cream. Add the cooled cherries.
  6. Delicately slide the 2nd layer of cake on top of the cherries layer.
  7. Spread with cream. 
  8. Place reserved cherries as desired.
  9. With a sharp knife or a vegetable peeler, shave some chocolate. Cover the rest of the surface with shaved chocolate.
  10. Cut and enjoy~

Tuesday, January 5, 2016

Mini Frozen Cheesecakes


After making the pumpkin cake roll for Christmas dessert, I had some chocolate whipped cream leftover, on top of having some cream cheese mix left. On top of that, I also had a bunch of brownie crumbs, as it was very difficult to cut good pieces out of the brownie.


In an effort to use up all these leftovers (or at least most of them, as I still have brownie crumbs left), I made these mini frozen cheesecakes. The base is simply brownie crumbs pressed into the bottom of a silicone mini-cupcake mold. Then I folded the cream cheese, quark, and icing sugar mixture into chocolate whipped cream, and plopped it all on top of the bases.


The tops were flattened with the back of a buttering knife, and everything was put into the freezer. While a little hard to manage straight out of the freezer, as they were virtually impossible to scoop with spoons, these cheesecakes were enjoyable when softened but still cold.

Saturday, December 26, 2015

Christmas '15: Pumpkin Yule Log Cake


Christmas desserts this year were split between my cousin B and myself. B made little choux and éclairs, and I dealt with the egg-free stuff for those among us that don't eat eggs. Having seen a recipe on Dash of (Vegan) Butter for a vegan pumpkin cream roll, and seeing how I still had a pumpkin sitting around, I jumped on the opportunity.

First, I roasted the pumpkin in the oven, puréed it in a food processor, then drained it in a colander with paper towels in the fridge to remove all excess moisture. Then I whipped up about 6 tbs of aquafaba (the liquid from a can of chickpeas), and proceeded with the rest of the recipe.


For the filling, I folded some whipped cream into the leftover cream cheese mix from the brownie topping. I also added a little more sugar. Then I cut a small section at the end to make a stump on top, which was glued on with more of the cream cheese mix.


The whole cake was covered with whipped cream that was mixed with chocolate powder. At first, I just dragged a fork over the whipped cream to make it seem like bark, but then opted instead to shave some chocolate off large choc chips (the only chocolate I had) to dust over the top.


In the end, the cake was well liked, but the cake batter was a little tough. Either I had overbaked it a bit, or the amount of dry ingredients should have been reduced.

PUMPKIN CAKE ROLL RECIPE
  Ingredients
  • 3/4 cup flour
  • 2 tsp cinnamon
  • 1 tsp baking powder
  • 1 tsp ground ginger
  • pinch of salt
  • 1/2 tsp ground nutmeg
  • 6 tbs aquafaba
  • 1/4 cup applesauce
  • 3/4 cup sugar
  • 2/3 cup puréed pumpkin
  • 1 tsp apple cider vinegar
  • icing sugar
  Procedure
  1. Preheat oven 180°C.
  2. In a bowl, combine dry ingredients. Set aside.
  3. Whip aquafaba on high until soft peaks. 
  4. On medium speed, add in applesauce, the progressively add sugar.
  5. Mix in pumpkin and vinegar.
  6. Fold in dry ingredients.
  7. Pour into a prepared pan, then bake for 15 min or until it springs back when lightly pressed.
  8. After removing from oven, immediately put on a clean dishtowel dusted with icing sugar.
  9. Roll it up with the towel and set to cool.
  10. Once cooled, unroll, fill with desired cream, and roll again.
  11. Ice as desired, and chill until eaten.

Christmas '15: Brownie with Cream Cheese Pattern


This year for Christmas presents, I decided to bake a big batch of brownie and cut it up into squares to pack up. I had originally planned to have 2 different brownies and some kind of gingerbread-like bars in there as well, but due to time constraints, I had to settle with just the one.


For the brownie, I used a double batch of the classic egg-free recipe I have been using. To make it a little more interesting, at least to the eye, I topped it with a pattern of cream cheese, quark, and icing sugar mix. The quark helped make the cream cheese more fluid, and I had some left from before that needed using up. The pattern was made by drawing lines of cream cheese mix over the top of the batter, then running a chopstick in opposite directions.


The wonderful image I had in mind for nice, even squares went out the window the moment I cut into it after cooling and refrigerating it a couple of hours. The no-crust parts were crumbling and falling every which way. Luckily, I managed to somehow cut 30 squares that were more or less intact, and to package them in little bags, each piece sitting on its own square of baking paper. Unfortunately, in some cases, the pattern did not really survive the cutting and packaging.

Mint Chocolate Cookies


December 15, 2015

As the end of the semester approached, I wanted to give little packs of cookies to my professors, as thanks for teaching. I also felt that some of them had been particularly helpful to me this semester.

I looked around in my stash of baking ingredients, to see what kinds of cookies I could make with what I had. I had thought about chocolate chip cookies, but I didn't have anymore choc chips... No more cranberries either, and at the time I was starting to dig in my boxes, I was not up for zesting a lime. Then I saw a box of mint-filled chocolates I had gotten before but that was just sitting there. I figured I could try and put that on or in a cookie somehow.


My first test attempt was a flop and almost left a chunk of charcoal at the bottom of the oven. The cookie had fallen through the grill despite the baking paper (I neglected to put a pan between the paper and the grill), and had spread like crazy. Some flour and chilling later, I finally managed to get something decent.

The mint chocolates were cut into small rectangles/triangles depending on the part of the chocolate. I then stabbed them through the top of each cookie formed. Some pieces melted and caramelized on the sides of the cookies.  It might have been better if I had just stuck a bigger slab in the middle of each cookie, but I settled with what was done.

RECIPE
  Ingredients
  • 1 1/2 cup butter, softened
  • 1/2 cup golden sugar
  • 1 cup brown sugar
  • 1/2 tsp salt
  • 2 tsp Orgran egg replacer
  • 4 tbs water
  • 3 cups flour
  • 1 tsp baking soda
  • 2 tsp hot water
  • mint chocolate (or sub in 1 cup chocolate chips)
  Procedure
  1. Preheat oven 175°C.
  2. Cream butter and all sugar until fluffy.
  3. Mix the egg replacer and the 4 tbs water (proportions ~2 eggs) and beat them into the mixture.
  4. Dissolve baking soda into the hot water before adding.
  5. Stir in flour and chocolate chips.
  6. Put on baking sheet by large spoonfuls.
  7. Bake for 10-15 mins.

Sunday, December 6, 2015

Marbled Banana Brownie Wannabe


The original title for this post was going to be "marbled peanut butter and chocolate banana brownie wannabe," but since that is very long-winded, let's settle for the short version.

A week or two ago, my cousin L bought a bunch of bananas. As usual, they sat in the fruit basket getting riper and riper, until there was nothing left to do with them but to bake them. I am still not in the mood for banana bread (don't ask me why), so I thought I'd make another banana brownie. Then L saw the Facebook post from someone in the building saying they had leftover peanut butter brownie, and so she asked me if I could make it peanut butter this time.


To make things more difficult for myself, I thought I'd tackle a marbled peanut butter chocolate one. I simply made half of a batch of chocolate brownie batter (using half of the recipe in the link above), and half of a batch of an experimental peanut butter variant, which simply used 100 g of creamy peanut butter instead of the chocolate. Then I dolloped it progressively, alternating batters, into my loaf pan, and swirled it all with a knife.

Although the texture was amazingly soft and great to eat, it made it very difficult to cut the loaf and get decent slices that didn't collapse and break every which way. I'm still debating whether it's worth trying to fix that and possibly sacrifice the texture. To be determined in the future, I guess.

Friday, October 2, 2015

Murder Mystery Carrot Cake


This week, an event that was a collaboration between two societies at the university (cooking and games) occurred. This was a Murder Mystery Dinner! I was asked if I wanted to bake and thus contribute to the dessert spread, and as I was being flooded in schoolwork, I (of course) decided to jump on it!


I wanted to "catch up" on the lack of frosting and layering from the last cake I made for Cooking Society, so I went all out. I made a double batch of carrot cake in a 24 cm springform pan. The next day, I cut it into 2 layers, and made a frosting out of cream cheese, Greek yogurt (to increase the volume), and icing sugar. I spread this between the two layers, and on top of the cake, and piped some dollops with my new silicone piping bag and some piping tips that I never got to use before. Unfortunately, the frosting had warmed considerably at that point, and was not so firm.


To keep up with the theme, I piped "Murder Mystery" with the crossed fork and knife logo of the cooking society, and added a smattering of powdered cinnamon on top.

The baking paper is still visible, as I delivered it in the springform pan covered with a sheet of aluminum foil to keep dust and the like at bay. I decorated the cake during my lunch break, then went to class, while the cake rested in the fridge. I then came back to pick it up, and decided not to risk biking with a cake in my hand.

Monday, June 1, 2015

Nutty Brownies


I was going to visit some family friends. When I go, I usually bring some baked goods. At a loss as to which recipe to use, my mom suggested that I bake brownies again, as those friends love chocolate. I wanted to be able to cut through the sweetness a bit more, though.


Instead of using water, I put in a couple of tablespoons of decaffeinated coffee (because I did not want to keep them awake at night from eating brownies), and topped them with nuts. I made a small bunch of cupcake-sized ones to give away, and made another batch into a large, round brownie to share with my family.


Although I had added some coffee flavor in, I had also reduced the amount of sugar, because the last time, I had deemed it a bit too sweet. My nut preference would have been walnuts, but since I did not have any on hand, almonds and cashews had to suffice. This time, I did refrigerate the cake, which gave it a more fudgy texture than when not refrigerated.


The recipe can be found HERE.

Wednesday, May 20, 2015

Eggless Brownies


I think #5 on my brother's dessert wishlist (briefly mentioned in my previous post) was brownies. I had never made brownies before, but hey, it was time to try! I came across this recipe that looked awesome, and I just happened to have leftover applesauce from making the apple tart.

Having anticipated that I would be baking at least some kind of chocolate dessert, I had made sure to buy chocolate when I went to buy the apples for the tart.


These smelled heavenly while baking and cooling. It was a little difficult to go to sleep after (it was approximately 12:30 am by the time I was done with baking and cleaning up). I baked them in my little silicone cupcake molds, as I did not have baking paper with which to line a pan. I made 2 little packages of 3 cup-brownies each to give to my brother and his traveling companion. Due to lack of time, however, I did not refrigerate them as required in the original recipe.


A recipe that I will definitely make again!

BROWNIES RECIPE
  Ingredients
  • 3/4 cup flour
  • 1/4 tsp baking soda
  • 1 tsp baking powder
  • pinch of salt
  • 3 tbs (~28 g) butter
  • 1 1/2 up (~265 g) chocolate
  • 1/2 cup applesauce
  • 1/4 cup sugar
  • 2 tbs hot water
  • vanilla
  Procedure
  1. In a bowl, mix flour, baking powder, baking soda, and salt. Set aside.
  2. Melt chocolate and butter until chocolate appears partly melted. Mix until smooth.
  3. In a large mixing bowl, combine applesauce and sugar. Mix until sugar has dissolved.
  4. Mix in hot water and vanilla.
  5. Add chocolate mix, and mix well.
  6. Fold in dry ingredients with a spatula.
  7. Bake 180°C for 25-30 minutes or until a toothpick comes out dry.
  8. Refrigerate 1 hour before cutting.

Tuesday, May 19, 2015

Triple Tier: Cake Pops, Banana Bread, and Apple Tarts


The last Thursday of the semester was Ascension Day, which is a holiday around where I am. Due to still having a class to attend the next day, I could not go home yet, but since the class itself didn't require any work, I decided to spend the day in one of my favorite activities: baking.

I had invited many of my friends to come pick up some sweets -- knowing that many of them still had papers and/or exams to deal with -- or to just come and chat with some tea and desserts. I spent most of Wednesday afternoon and Thursday morning baking.


The first of the three desserts were these cake pops. I made them with a double batch of my trusty vegan cake recipe, to which I added a bunch of cinnamon and a dash of nutmeg. After crumbling the cake into crumbs, I moistened it all with a homemade pumpkin puree. I made that by roasting half a pumpkin until soft, then blending the flesh. The mix was then rolled into balls, and a chocolate-covered toothpick was inserted in each of them, then left to set and cool in the fridge overnight. On the day of the event, I dipped them in melted dark chocolate (this time melted in 30-seconds lapses in the microwave, due to my inability to deal with a double boiler technique while handling two other recipes). They were then topped with crushed, salted pistachios and chocolate sprinkles.


Next was a single batch of banana bread, made the usual way in a loaf pan. I cut the banana bread in half lengthwise, then sliced each half to get regular-sized parts.


Finally came these mini apple tart bites, made with circles of pâte brisée, some homemade applesauce, and microwaved apple slices shaped into flowers. I then baked the whole assembly for an additional 10 minutes, then glazed them with the drained water from the applesauce, to which I added some citrus pectin due to a shortage of time. If I have more time, I usually reduce the juice into a glaze. The procedure is a more messy, rushed version of this one.

Saturday, March 28, 2015

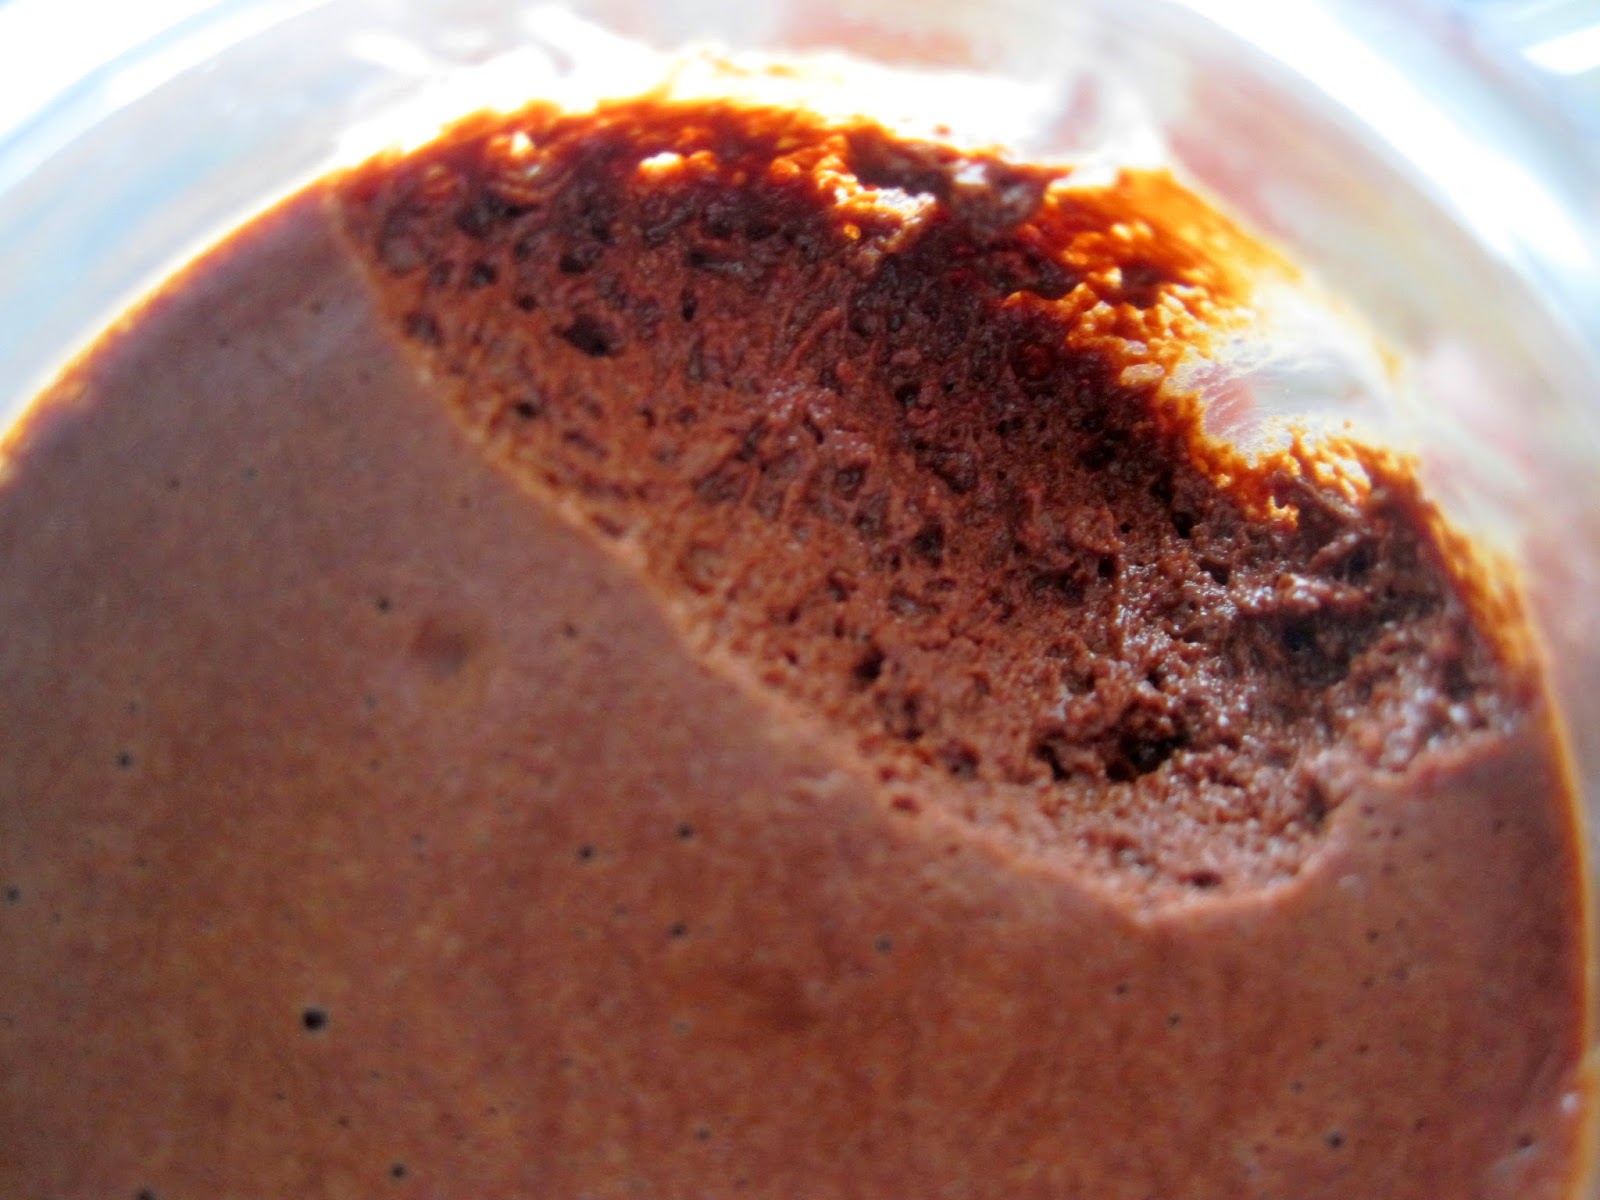
Egg-free Chocolate Mousse


I found out via Z'oeufs peux pas, a French cooking blog full of egg-free recipes, that the juice of chickpea cans can be used instead of egg whites for whipping up. That was something that took me completely by surprise!


And surprisingly, that chickpea juice really did whip up just like egg whites. My eyes got really big as I watched it transform under the beaters. And the result really is foamy and mousse-like!


This was nice and rich, but the texture was such a nice surprise!

RECIPE and TUTORIAL
  Ingredients
  • 180 g chickpea juice (filter a can of chickpeas and collect the water)
  • 200 g dark chocolate
  • 40 g butter
  • pinch of salt
  Procedure


     1.  Weigh out chocolate.
     2.  Add in butter.
     3.  Melt it all.
     4.  Whip up the chickpea juice into firm "snow."
     5.  Carefully incorporate the chocolate mix into the chickpea foam.
     6.  Pour into ramekins or a serving dish.
     7.  Chill for at least 4 hours.
     8.  Enjoy~