Hey guys,
For a long time now, I've been debating on migrating this blog to another platform, under another identity. This has now mostly become reality!
You can find all my posts and recipes at blueblossomsbaking.wordpress.com
All new content will only be posted there from now on.
I'm still in the process of re-linking all the posts and everything on the new blog, so some of the links still lead here, which is why Flameshaft's Cooking is still up on the interweb. Once I am done cleaning the cobwebs and made the new blog independent, I will be removing this one.
I'll post once I'm ready to delete this blog, so you guys know.
I hope your days are filled with sweets :D
Friday, June 16, 2017

Wednesday, June 7, 2017
Mint Ganache-filled Chocolates

Yesterday, my 6-yo niece opened up my 2 bars of dark baking chocolate, and messed up the packaging enough that I couldn't re-wrap them. I was afraid of them getting dirty or eaten by mice, so I decided to make mint chocolate truffles. Then on a whim, I asked my cousin B if she happened to have chocolate molds.
The answer: YES!
Therefore, I went and made an improved version of the encased chocolates I failed at before.

This second attempt at tempering chocolate worked well. I guess it did help that I didn't get interrupted midway because dinner needed to be made and I needed to move away from the stove. I first filled the molds (half-spheres and heart shapes) with the chocolate, then upended them to form hollow shells. 10 minutes in the fridge, then I could fill them with my prepared minty ganache.

After another 5-minute nap in the fridge, I covered the bottoms of the chocolates with more tempered chocolates and let them nap some more in the fridge.
Today, I took advantage of the daylight to snap some nice pictures. The top (shell) layer of chocolate is a bit thick for my liking, but I'm really glad that they turned out so nice! And I must say, that mint chocolate ganache is pretty addicting!
Honey Cinnamon Butter Cookies

These festive December 2016 cookies were baked as a gift. I had run out of all-purpose or pastry flour so I had to fall back on self-rising flour. I hunted around the internet, and came across this recipe.

For fun, I rolled these into coarse sugar so they would have a bit of a crunchy sparkle.
RECIPE
Ingredients
- 100 g butter, softened
- 13 g sugar
- 2 tbs (42.5 g) honey
- 150 g self rising flour
- cinnamon (optional)
- pinch of salt
Procedure
- Preheat oven 180°C.
- In a mixing bowl, mix butter, sugar, and honey until smooth.
- Sift in the flour, and add in cinnamon if using.
- Roll into 16 balls and flatten slightly.
- Roll into coarse, granulated sugar (optional).
- Bake 8-10 mins until edges are browned.
- Cool 10 mins on the pan before moving to a cooling rack to cool completely.
Shortbreads
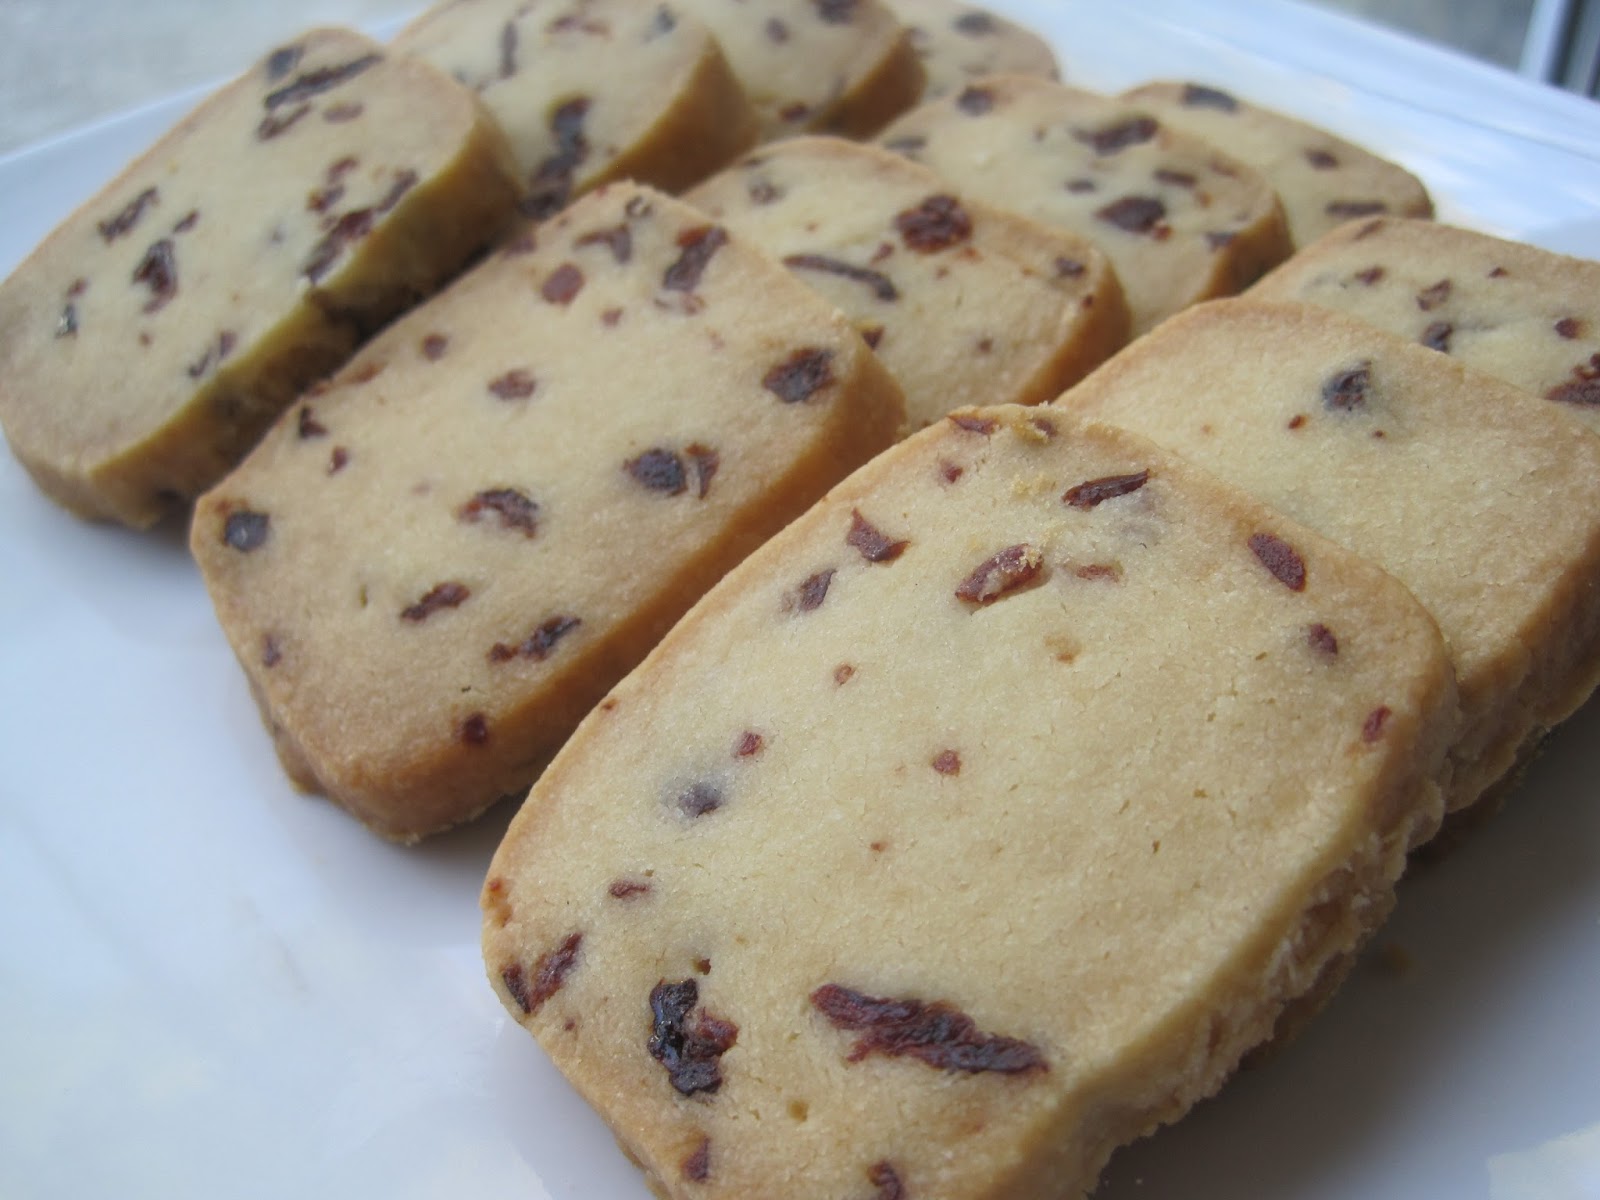
Whew, it's been a long time since I last blogged about baking. I've been meaning to, but a combination of assignments/thesis writing and laziness have kept me away......

These shortbreads date from last fall, the first being cranberry shortbreads baked in October 2016. I made the dough into a long log that I attempted to keep fairly rectangular in cross-section, then sliced the dough into individual cookies after chilling. This does avoid the monotony that can come from rolling out the dough and cutting it into shapes. The down side is the shapes are more limited, as the dough is really soft prior to chilling.

It's been so long I can't quite remember why I baked to begin with, but I think it may have been to give to my dad's colleagues at the hospital...
Next are some peanut butter chip shortbreads, and some candied orange ones.

These were baked in November, for a get-together with my cousin L and a friend S. Last semester, we got together a lot to eat a quick dinner then spend the time working on our respective theses. I had felt like baking I recall, so these came to be.

The recipe for all the shortbreads is the same as these ones that I have made several times already. I just swapped out the filling.
Wednesday, November 16, 2016
Apple and Pear Crumble

Too many apples, too many pears. Not much time to make a much more elaborate dessert, so it was time to whip up some crumble. Instead of making a large dish this time, however, I made 3 large individual serves.

First, I diced apples (yellow) and pears (green) separately, mixed with some lime juice and zest, and a small amount of sugar. Then I filled each dish halfway with apples, and filled the remaining half with pear. This made for a very nice difference in color before adding the crumble mix.

Then I covered the whole dish with a crumble mix (flour, brown sugar, butter) in which I had mixed some oats for extra fiber and fun. I then decided to make a difference between the apple and pear side, so more oats were sprinkled over the pear half, and chia seeds over the apple half.
Each dish was then baked for about 20 to 30 mins at 130˚C to crisp the topping, and make the fruits tender. These dishes were quite large for individual serves.
Apple crumble recipe over here~
Sunday, October 16, 2016
Fresh ginger cake

I don't know how well known it is, but Chinese or Asian people like to make a lot of ginger water (grated ginger simmered in water to release the juice and spiciness) and drink it for health reasons. As I was feeling unwell, I decided to make a small pot of it with our remaining ginger. The ginger was so spicy, I felt like I was drinking fire!
The side effect of making this ginger water is the ginger pulp that remains. I could have made another batch or two of the water to drink, but wasn't too keen on drinking it after the first batch. So I settled to make a cake with the pulp.

I found a recipe on Epicurious that I felt was adequate. I did make some changes to the recipe to fit the ingredienst I had on hands. A quick breakdown: reduced sugar, reduced oil, put more ginger, omitted cloves and pepper, and used Greek yogurt to replace one egg, and a chia seed and water mix to replace the other one. I also didn't have molasses, so I replaced it with dark brown sugar.

RECIPE
Ingredients
- 3/4 cup (150 g) grated ginger pulp
- 3/4 cup (150 g) dark brown sugar
- 3/4 cup (130 g) cane sugar
- 3/4 cup (165 g) oil
- 2 1/2 cups (300 g) flour
- 1 tsp cinnamon
- 1 cup hot water
- 2 tsp baking soda
- 1/4 cup (71 g) Greek yogurt
- 1 chia egg
- 1 tbs ground chia seeds
- 3 tbs water
Procedure
- Preheat oven 180˚C.
- To make the chia egg, mix the ground chia seeds and 3 tbs water in a small bowl. Let sit for 5 mins until gelified.
- In a mixing bowl, mix dark brown sugar, sugar, and oil.
- Dissolve baking soda in hot water, and add into the sugar mix.
- Stir in the grated ginger.
- Fold in the flour and cinnamon.
- Mix in the Greek yogurt and chia egg.
- Pour into a prepared pan (I baked it in a 9 in. springform pan lined with baking paper).
- Bake for 45-60 mins, or until a toothpick comes out clean.
- Cool for 30 mins before unmolding.
Saturday, October 15, 2016
Banana Bread Muffins [Gluten-Free]

For last week's hallway dinner, we had a theme of American food. I had originally planned to try making a sweet potato pie, but as my cousin L had opted for sweet potato fries, I left the few sweet potatoes we had for her to use.
I was a tad short on time, so I fell back onto a much-baked classic: banana bread. I found to my happiness that it fit the theme perfectly. So I made one of my usual loaves of banana-topped banana breads (baked many times before). Then I settled down to make a few samples of a gluten-free version for a neighbor that can't have gluten.
Since it was only for one person, I made 1/4 of the recipe, which yielded 4 muffins. I used a precision scale (that goes to 0.01 g) to make the measurements.
RECIPE (yields 16 cupcakes)
Ingredients
- 3-4 ripe bananas
- 158.96 g gluten-free flour of choice (I used buckwheat flour)
- 28.4 g glutinous/sticky rice flour
- 1/2 tsp baking soda
- 1 tsp baking powder
- 1/2 cup (100 g) sugar
- pinch of salt
- 2/3 cup (146 g) oil
- 1 tsp vanilla extract
- cinnamon, to taste
- nuts or dried fruits (optional)
- I typically use walnuts and dried figs. In this case only dried figs as I ran out of nuts.
Procedure
- In a mixing bowl, mash the bananas.
- Add sugar, oil, and vanilla. Mix well
- Fold in the dry ingredients, sifted.
- Fold in dried fruits and nuts if using.
- Bake at 180˚C for 20-25 minutes or until a toothpick comes out clean.
- Cool and enjoy~
Sunday, September 25, 2016
Potato Cake

Friend over for dinner. I wasn't too sure what to make, and I had just happened to see this recipe on Tastemade France. Therefore, I set about to make it.
Simply speaking, it is a cake made with mashed potato, flour, baking powder, and (soy)milk. I folded in dried tomatoes, olives, and mozzarella, and baked the whole thing until cooked through. The result was very filling, spongy, and savory.
Mini Strawberry Crostata (Gluten-Free)

New semester, new batches of hallway dinners! This year, the whole end of the hallway changed, as the seniors graduated and new freshmen come in. The new hallway as a whole became a bit more complicated in terms of food. In all, we have vegetarians, lactose intolerants, gluten, soy, and nuts allergies...
This made baking for an Italian-themed dinner more difficult. I therefore opted for the simplest thing I could think of, which was crostata. Crostata are jam tarts, usually covered in a lattice of some kind. The challenge, this time, was working with gluten-free flour (buckwheat flour in this case).

I came across a recipe for buckwheat flour pastry from pep's Free from Kitchen, which I used with a flax egg. The filling is simply strawberry jam from the supermarket, to which I added lemon juice to cut through the sweetness. I used a pastry cutter to cut the strips of dough to make the lattice on top, which all threatened to break left and right. All in all, it resulted in a pastry that I felt was a bit dry.
Eggless Lemon Bars

A few weeks ago, my cousin L and I had a friend over for dinner. I also had a single overripe banana sitting around waiting to be either used or dumped. Since I am no fan of dumping food, I looked for a way to use it up.
Banana bread requires at least 3 bananas, and so did my banana brownies. I then recalled a recipe I had stumbled upon for an eggless version of lemon bars, from Heart of a Baker. Not that I had ever tasted any classic lemon bars, I opted to give it a try.
First, I lined a small pan with my usual pâte brisée (shortcrust pastry), which I baked for about 10 minutes. Then I filled it with the lemon filling, and baked it some more. The result was a zingy, fresh bar that smelled like banana but tasted 100% lemon.
LEMON BAR RECIPE
Ingredients
- 1/4 recipe pâte brisée (shortcrust pastry)
- 1 ripe banana
- zest and juice of 2 lemons
- 1/2 cup sugar
- vanilla
- 1 tbs cornstarch
- 1 tbs flour
- icing sugar, for dusting
Procedure
- Prepare the crust in an 8 in. x 8 in. pan as per the shortcrust pastry recipe. Precook 10 mins.
- In a bowl, mash the banana.
- Add in the rest of the ingredients.
- Pour into the crust.
- Bake for 30 mins at 180˚C or until set.
- Cool then refrigerate min. 1 hour.
- Cut into squares or bars.
- Dust with icing sugar before serving.
Chocolate-Encased Mint Truffles

I made a batch of mint truffles at home to give to some family friends, and also to share with my family. My 5-year-old niece got involved, helping me break apart chocolate, and mixing in the cream.
For the family friends, I did not have time to coat them. In fact, I only barely managed to roll them in cocoa powder, they were so soft. My niece didn't like them coated, as the cocoa powder is pretty bitter, so she just ate the filling.
With the 2nd half of the batch, I tried to make them last a little longer, so I tried to temper chocolate for the first time. By the time my chocolate was tempered, the filling was no longer holding shape. By then, I was too tired to start over, so I just scooped portions of filling and dropped it into the chocolate. The whole thing was then laid on a sheet of baking paper. When all the filling was covered, I rolled them in cocoa powder.
Caramelized Apple Bread Pudding

I went home after my trip to the US, and my mom told me to do something with a bag of sliced bread that was sitting around. She feared that it would start molding in the near future. My dad then chipped in, saying a bunch of apples were sitting around. When there is dried bread or a lot of bread to use up, my only thought is something along the lines of a bread pudding.

Therefore, I made a thin custard with soy milk, sugar, some vanilla, and corn starch. Since the bread wasn't dried, I cut it up and dried it in a toaster oven. After that, I poured the custard on top of the bread and let it sit. In the meantime, I started working on a basic caramel.
From past experiments with caramel, I feared it would not turn out so well. I generally have a hard time with caramel. Yet for once, this one turned out beautifully. I did burn my finger when I accidentally touched it while it was in the pan (be careful, caramel is extremely hot!) After taking care of my burn, I poured it all into the bottom of a greased loaf pan. Then I cut some thin apple wedges and laid them on top of the hardened caramel.
I then poured about 1/3 of the bread mix, sprinkled some diced apples, and repeated until I reached the top. There was a bit of custard liquid and a end slice of bread left, so I layered that on the very top. The whole thing was baked until browned.

My parents didn't get home until late, so I left the whole bread pudding in the fridge overnight. The next morning, I plated it onto the biggest, long plate I could find, and still it could barely fit! I think overall it was a bit soft. Next time, I probably would add less custard to the bread. It most probably also would benefit from even more apples throughout the middle.

Tuesday, August 2, 2016
Mint Chocolate Truffles

I like watching cooking videos on Youtube, and I once went on a Gordon Ramsay spree. In a two-part video, he made mint chocolate truffles with his children. Those are what I tried to make for my friends and to give to the staff of a tea house where my friend works.
The video doesn't give the proportions of ingredients, so I got them off Good to Know. I did change a few proportions myself, but more on that in the recipe below. For a few ingredients (butter, sweeteners), I simply eyeballed the amount. I also used as much chocolate as I had, and scaled down the rest of the ingredients based on that.

RECIPE
Ingredients
- 500 g dark chocolate, chopped
- 500 mL heavy cream
- 1 small bunch fresh mint
- 100 g butter, softened
- honey/brown sugar, to taste
- unsweetened cocoa powder
Procedure
- Lightly bruise the bunch of mint to release its fragrance. Put it in a pot with the cream.
- Heat over medium-low heat until bubbling.
- In a heat-proof bowl, put chocolate and butter.
- When the cream bubbles, mix in sweetener.
- Strain hot cream into the chocolate. Mix until chocolate is melted and smooth.
- Pour in a wide, dish. Let cool to room temperature, then refrigerate at least 1 hour.
- When cold, take teaspoonfuls out, roll into balls, and drop in a plate of cocoa powder. Roll around to coat.
- Eat within 3-4 days.
Banana Bread Muffins

More baking for friends! Decided to turn my usual banana bread into muffins this time! I poured each muffin tin about 3/4 full, then pushed a slice of banana on top, and sprinkled some brown sugar on top to caramelize. After baking them, I let them cool before they got eaten up.

Chocolate Chip Oatmeal Cookies

I wanted to bake cookies for my friends. I found a load of oatmeal so I went for chocolate-chip oatmeal cookies (because I didn't have any cranberries on hand).
Recipe yonder this way~ Just sub chocolate chips instead of cranberries.
Chocolate Mudcake

My friend's birthday was last month, so when I moved in temporarily into the apartment she shares with a couple other friends, I brought a chocolate cake with me. I didn't have any cocoa powder on me, however, so I used a white chocolate mudcake recipe and subbed dark chocolate for the white chocolate.

Without my usual tools, I had to eyeball the cutting of the cake in half to put whipped cream between both halves.

Random decoration with chocolate chips and shaved choc chips.

Recipe similar to the white chocolate mudcake in this cake~
Sunday, June 19, 2016
Brownie

For lunch with friends, I got a request for brownie. I made a huge pan, and topped it with a quick ganache of microwaved chocolate and cream. I originally wanted to pipe designs on the top of it with the ganache, but got lazy and ended up just wiping it back and forth as it poured out of the spoon.

Spinach Artichoke Dip

A meal between friends with a lot of different appetizers. I made this small dish of spinach artichoke dip to eat with chips or crackers.

I kind of eyeballed the quantities. Basically, it's just a package of cream cheese, strained pack of thawed frozen spinach, chopped up jar of artichoke hearts, some extra cream, and seasoning. Then I topped it with cheese and broiled it just to melt the cheese.
Vegan Strawberry and Chocolate Cake

For yet another hallway dinner, I opted to go through a really quick cake recipe. One of my hallway mates had recently decided to try veganism, so I went for this basic cake recipe I've been using. I added in some frozen strawberries I stewed and cooled into the batter,

I actually wanted to top it with a light ganache, but the only chocolate I had on hand contained milk. So I tried making some kind of vegan frosting by mixing random quantities of cocoa powder, icing sugar, and hot water until reaching a frosting consistency.

Unfortunately, I didn't think what would happen to the frosting after it cooled... it became pretty sticky but apparently people still liked it. Also unintended, the chocolate flavor came out so much stronger than the strawberry...

Monday, May 2, 2016
Matcha Tiramisu...

... or as my friend C dubbed it, "Tea"ramisu.
A couple of weeks ago, I picked up a brick of whipping cream that someone was giving away for free in the building (freebies are always nice). Then last week, I picked up a ricotta at the supermarket. I was really in the mood for making tiramisu, except.............. I only have about 5 spéculoos cookies left. That wasn't going to be enough.
While digging through the various drawers in our little student apartment, I found the pack and a half of digestive cookies I had left from last semester. So I opted for matcha-flavored tiramisu!

I followed my normal recipe. While whipping up the whipping cream to soft peaks, I added matcha powder and a bit of icing sugar, taste-testing in the process until I was satisfied with the flavor and color (I had so many matcha bakes that came out not tasting nearly strong enough.....). Then instead of dipping the cookies in coffee/decaf, I brewed some green tea and dunked them in that. then came layering. I originally wanted to make the heart out of green matcha, but due to the cream's pale green color, the matcha wasn't coming out as strongly as I wanted. So chocolate it was.
Tutorial to normal tiramisu yonder this way~
Subscribe to:
Posts (Atom)